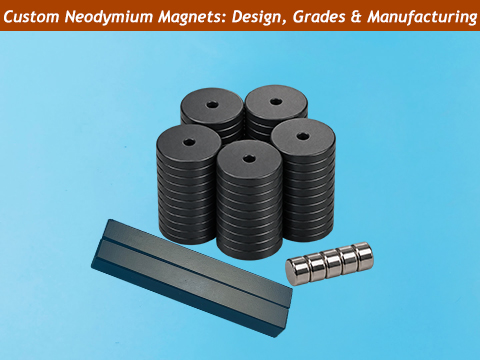
 Custom neodymium magnets
are permanent magnets made to meet the requirements of a specific product or assembly. Their shape, size, material grade, pole direction, and coating can be tailored to the available space, required magnetic performance, and operating conditions.
Those requirements vary by application. A sensor needs a magnetic field it can read as a shaft turns. A
motor magnet must fit the rotor and provide the required field at operating temperature. An outdoor mount needs enough holding force and protection from rain and moisture.
At AEMagnets, we start by reviewing how the magnet will work once installed. That helps us turn application requirements into a design we can manufacture and a specification the customer can use to evaluate the first sample.
How to Specify a Custom Neodymium Magnet
At AEMagnets, we review the magnet drawing alongside the assembly it will go into. The assembly tells us where the magnetic field or force needs to act, which dimensions control the fit, and how the poles should be oriented.
Set a Measurable Performance Target
For a sensor or motor, specify the required magnetic flux density in millitesla (mT) or gauss (G). Show where that value needs to be reached, such as at the sensor location or at a defined point in the motor’s working air gap.
For a magnetic mount, define the load direction and the surface it attaches to. For example, on a
1.5 mm steel plate, pull-off force is measured perpendicular to the plate, while shear force is measured parallel to it. The relevant target depends on how the mount will carry the load.
Define Finished Dimensions and Tolerances
Dimension the features that control fit. A ring magnet typically needs an outside diameter, an inside diameter, and a thickness. An arc magnet needs inner and outer radii, an arc angle, and a length. State whether the tolerances apply to the finished part after coating.
For two sets of arc magnets that share a center, the facing radii determine the nominal radial air gap. An inner radius of
248.1 mm on the outer set and an outer radius of
243.1 mm on the inner set give a
5.0 mm nominal gap. We check the tolerances on both radii because they affect the clearance after assembly.
Specify Magnetization Direction and Pole Layout
Show the magnetization direction and label the required pole faces. For a countersunk disc,
axially magnetized specifies the direction through the thickness. Adding
north pole on the countersunk face tells us which face must be north.
A two-pole encoder ring magnetized across its diameter has north and south on opposite sides of the ring. For a multipole design, show the number of pole pairs and where they sit. We use that layout to review the magnetization requirements and check the pole pattern on the first sample.
How to Choose a Neodymium Magnet Grade
At AEMagnets, we compare
neodymium magnet grades based on the magnetic performance the assembly needs and the highest temperature the magnet will face. These two requirements help us narrow down the options before comparing individual grades such as N42 and N52.
Compare Grades Under the Same Conditions
The numbers in
N35, N42, and N52 refer to the grade’s maximum energy product, a measure of magnetic energy per unit volume. A higher grade number can help when a design needs more magnetic output in a limited space. The field in the finished assembly also depends on the magnet’s shape, pole direction, and working gap.
When we compare N42 and N52 for an arc magnet, we keep the dimensions, magnetization direction, air gap, and temperature the same. We then compare the field at the same point in the assembly. If N42 already meets the target, we can help the customer decide whether the additional output from N52 is worth the price difference.
Check Performance at the Operating Temperature
Suffixes such as
H, SH, and UH indicate higher resistance to demagnetization. For a high-temperature application, we compare the candidate grades’
intrinsic coercivity (Hcj), a measure of how well the material resists demagnetization. We also check the demagnetization curves at the expected operating temperature, taking into account the magnet’s shape and any opposing magnetic fields in the assembly.
For a
5 mm cube that needs to operate at 150 °C, we may compare N50SH and N52SH with alternatives such as N48SH or N45SH. We use the grade data to narrow the options, then check whether the prototype delivers the required magnetic output at the intended operating temperature.
How to Specify Coatings and Corrosion Protection
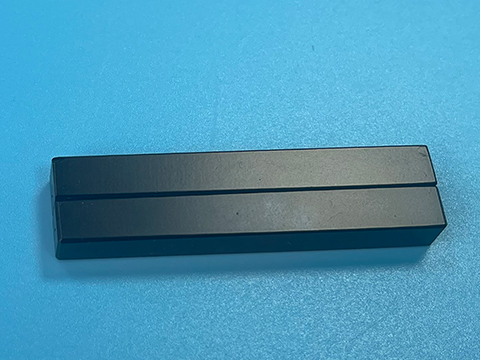
Sintered neodymium magnets are susceptible to corrosion. At AEMagnets, we first look at what the magnet will be exposed to and how much protection the assembly provides. A magnet inside a pump and one in an outdoor mount can need different types of protection.
Define the Exposure Conditions
For an outdoor mount, we check whether rain or condensation can reach the magnet and whether moisture can collect around it. For a pump, we ask whether the magnet will be splashed or immersed. If the magnet comes into contact with a glycol mixture, we consider the fluid composition, operating temperature, and duration of exposure.
Choose a Coating or Sealing Method
Two common
neodymium magnet coatings are nickel-copper-nickel (Ni-Cu-Ni) plating and epoxy. We compare them against the expected exposure and the fit of the finished part. If the magnet will be exposed to fluid for extended periods, we also consider whether the housing can seal it from direct contact.
For a tight-fitting part, we check the finished dimensions after coating. When the design relies on a seal, we review the magnet and housing together. For a pump magnet exposed to glycol, we can evaluate the proposed protection using the intended fluid mixture, operating temperature, and exposure time.
How Custom Neodymium Magnets Are Manufactured
At AEMagnets, we use the drawing to identify where defects are most likely to occur during production. A block that fits into a narrow slot needs close control of its finished thickness. A countersunk disc needs careful machining around the hole. A multipole ring needs its pole pattern in the right position. Checking these features on the first parts helps us reduce rework and improve batch yield.
From Alloy Powder to Finished Magnet
Sintered neodymium magnets start as fine NdFeB alloy powder. During pressing, a magnetic field aligns the powder particles and establishes the material’s preferred direction of magnetization. The pressed part is then sintered and heat-treated.
After sintering, we cut or grind the part to the specified dimensions and apply the required coating. We then use a magnetizing fixture to establish the poles shown on the drawing.
How We Control Production Quality for Different Magnet Designs
|
Custom magnet design |
Defects to prevent |
Production controls |
|
Rectangular block |
Chipped corners and thickness outside tolerance |
Allow for coating thickness during grinding. Check thickness and edge condition on the first parts. |
|
Countersunk disc |
Hole-edge chipping and poor screw seating |
Support the disc during machining. Check the hole and countersink before coating. |
|
Arc magnet |
Incorrect radii and uneven wall thickness |
Grind both curves from a common reference. Verify both radii and wall thickness on the first parts. |
|
Multipole ring |
Incorrect pole count, spacing, or alignment |
Align the magnetizing fixture to the drawing reference. Verify the pole pattern on the first magnetized part. |
From Prototype to Production
For a small prototype run, we first check whether an existing sintered blank has the required grade, dimensions, and magnetic alignment. A suitable blank may allow us to machine the samples using existing tooling. A custom pole pattern may still require a dedicated magnetizing fixture.
For repeat orders, we may use dedicated pressing tooling to form a blank closer to the finished shape. This reduces the amount of material we need to remove during machining. Before increasing the batch size, we check the first parts against the drawing for dimensions, surface condition, and pole pattern.
Conclusion
A good design for custom neodymium magnets meets the application’s needs at a cost that makes sense for the expected production volume. That balance matters when a project moves from a few samples to repeat orders.
Agreeing early on which requirements are fixed and where there’s room to adjust gives the manufacturer more options. It also helps the buyer compare quotes on the same basis and make a decision that works for both the prototype and production.
As a
neodymium magnet manufacturer, we can review your design and recommend a manufacturing approach for your expected order volume. Send your drawings or application requirements to AEMagnets to request a quote.